Easy Origami Paper Box: Step-by-Step Craft Tutorial
How to Fold a Paper Box is your perfect introduction to the magical world of origami! Today, we’re going to transform a simple square of paper into a charming, sturdy little box. Imagine a perfectly creased container with clean lines, ready to hold treasures, a sweet treat, or a thoughtful gift. This project is absolutely ideal for complete beginners, including kids, and takes just about 15-20 minutes to complete. You’ll learn fundamental origami folds and gain the confidence to create your own beautiful, handmade boxes for any occasion. Let’s get our hands busy and discover what wonderful things we’ll make today!

DIY: How to Fold a Paper Box – Creativebug Craft Classes & Workshops
Hello crafters! Welcome to Creativebug. Today, we’re embarking on a delightful journey into the world of origami by learning how to fold a simple yet incredibly versatile paper box. This project is perfect for beginners, requiring just a single sheet of paper and a little patience. Once you master this basic design, you’ll be able to create custom containers for all sorts of treasures, from small gifts and craft supplies to desk organizers and decorative accents. Let’s get folding!
Choosing Your Paper
The first step in any origami project is selecting the right paper. For this box, you have a lot of freedom!
Type of Paper: While you can use regular printer paper in a pinch, origami paper is generally preferred. Origami paper is thin, strong, and holds creases beautifully, which is essential for creating crisp folds. It’s also designed to be folded multiple times without tearing. If you don’t have origami paper, consider using thinner cardstock or even decorative scrapbooking paper.
Weight: For this box, a medium weight paper is ideal. If it’s too thin, it might be flimsy. If it’s too thick, it can be difficult to fold cleanly, especially with multiple layers.
Size: A standard origami paper size, like 6 inches by 6 inches (15 cm x 15 cm), is a great starting point. You can certainly use larger or smaller squares, just remember that the dimensions of your finished box will be directly proportional to the size of your starting square.
Single or Double Sided: This is where you can get creative!
- Single-sided paper: This type of paper has a colored or patterned side and a white side. When you fold the box, the inside will be white, which can offer a nice contrast.
- Double-sided paper: This paper has color or pattern on both sides. This will make the inside and outside of your box have the same aesthetic, creating a more uniform look.
For your first attempt, I recommend using single-sided paper so you can easily see which side is which as you follow along. Later, you can experiment with double-sided paper for a different look.
The Base Folds: Building the Foundation
Before we start the actual box folding, we need to create some essential creases in our paper. These creases act as guidelines, ensuring our final box is precise and neat.
Start with your square of paper. If you are using single-sided paper, place it colored-side down on your work surface. We want to see the white side as we begin.
- Diagonal Fold: Take the bottom-left corner of your square and bring it up to meet the top-right corner. Line them up precisely. Press firmly along the folded edge to create a sharp crease. Then, unfold the paper. You should now have a diagonal crease running from one corner to the opposite corner.
- Second Diagonal Fold: Now, take the bottom-right corner and bring it up to meet the top-left corner. Again, align the corners perfectly. Crease this fold firmly. Unfold the paper. You should now have an ‘X’ shaped crease pattern on your paper.
- Horizontal Fold: Turn your paper 90 degrees so it looks like a diamond, with the points facing up, down, left, and right. Take the bottom point and fold it up to meet the top point. Align the points precisely. Crease this fold firmly. Unfold the paper.
- Vertical Fold: Now, take the left point and fold it over to meet the right point. Align the points perfectly. Crease this fold firmly. Unfold the paper.
At this point, your paper should have creases forming an ‘X’ and a ‘+’ shape. This is often called the “pre-creasing” stage in origami, and it’s crucial for getting clean folds later on. Make sure all your creases are sharp and precise by running your fingernail or a bone folder along them.
The Fold Sequence: Let’s Make a Box!
Now that our paper is pre-creased, we can begin transforming it into a box. Follow these steps carefully, and don’t be afraid to go slowly.
Start with your paper colored-side up (if using single-sided paper). You should see the ‘X’ and ‘+’ creases.
- Bring Bottom Edge to Center: Locate the horizontal crease that runs across the middle of your paper. Take the bottom edge of the paper and fold it upwards so that it aligns perfectly with this center horizontal crease. Crease this fold firmly.
- Bring Top Edge to Center: Now, take the top edge of the paper and fold it downwards so that it also aligns perfectly with the center horizontal crease. Crease this fold firmly. Your paper should now look like a long rectangle, with two flaps folded towards the center.
- Bring Left Edge to Center: Rotate your paper so that the long folded edges are running horizontally. Locate the vertical crease that runs across the middle of your paper. Take the left edge of the paper and fold it inwards so that it aligns perfectly with this center vertical crease. Crease this fold firmly.
- Bring Right Edge to Center: Now, take the right edge of the paper and fold it inwards so that it also aligns perfectly with the center vertical crease. Crease this fold firmly. Your paper should now be a smaller, more compact square. The edges you just folded meet in the middle.
- Unfold the Last Two Folds: Carefully unfold the folds you made in steps 3 and 4. You’ll see the vertical crease again, with the paper folded back out to the sides.
- Create the Side Walls: This is where the magic starts happening! Look at your paper. You should see the horizontal fold lines from steps 1 and 2, and the vertical center crease. We’re going to use the existing creases to form the sides of the box.
- Pick up the paper. Notice the two points where the horizontal folds meet the outer vertical edges. These are the corners where the sides of your box will lift up.
- Gently push in on the left and right sides of the paper, along the vertical crease you made in step 3. As you push inwards, the paper should naturally start to lift up and form walls. The existing creases will guide this.
- Simultaneously, using your fingers, lift the bottom flap upwards. You’ll see that the diagonal creases from your initial pre-folding are now helping to form the corners of the box.
- Forming the Corners: As you lift the sides, you’ll notice that the bottom flap wants to fold upwards. We need to guide this fold.
- As you lift the bottom flap, use your fingers to push the left and right sides inwards. The paper should naturally want to fold upwards along the horizontal creases you made earlier.
- You’ll see the diagonal creases from the initial pre-fold guiding the formation of the box corners. You’ll essentially be folding the paper upwards, creating the walls of the box.
- Press down on the bottom of the box to flatten it, and gently shape the sides.
- Securing the Sides: Now you should have a box shape, but the side flaps might be a little loose.
- Take the flap on the right side and fold it inwards, tucking it against the inside wall of the box. The crease should run along the edge of the box.
- Do the same with the flap on the left side, folding it inwards and tucking it against the opposite inside wall.
And there you have it! You’ve just folded your first paper box. Take a moment to admire your handiwork. Gently press down on the bottom to make sure it’s flat and stable.
Common Beginner Pitfalls and How to Avoid Them
Even with clear instructions, origami can sometimes be tricky for newcomers. Here are a few common mistakes and how to steer clear of them:
- Fuzzy Creases: The most common issue is not making your creases sharp enough. This leads to a floppy, misshapen box.
- How to avoid: After every single fold, run your fingernail, a ruler, or a bone folder firmly along the crease. This will make your folds crisp and your box structure solid. Don’t be shy with your creases!
- Misaligned Corners/Edges: If your corners and edges aren’t perfectly aligned during the initial folds, your entire box will be off-kilter.
- How to avoid: Take your time, especially during the pre-folding stages. Line up corners with corners and edges with edges as precisely as possible. A small misstep at the beginning can be amplified as you continue folding.
- Difficulty with the “Collapse”: Step 6, where you start to form the box walls, can be a bit confusing. Sometimes people struggle to get the paper to collapse into a box shape.
- How to avoid: Trust your pre-creases! They are there to guide you. Gently push inwards on the sides as you lift the bottom flap. The paper should naturally want to fold along those lines. Imagine gently “squishing” the flat paper into a box shape. If it’s not cooperating, gently unfold and try again, paying attention to how the creases want to bend.
Varying Your Box Design
Once you’ve mastered the basic box, the possibilities for customization are endless!
- Size: As mentioned, the size of your starting square dictates the size of your box. Use a larger square for a bigger box, and a smaller square for a more delicate one.
- Paper Pattern and Color: This is where you can really let your creativity shine!
- Use brightly colored paper for a cheerful gift box.
- Try patterned origami paper for a more decorative touch.
- Consider using wrapping paper or even old maps for a unique, recycled look.
- Experiment with different paper textures – handmade paper can add a lovely rustic feel.
- Adding a Lid: This basic design creates an open box. To create a lid, you would typically fold a second box using the same method, but with a slightly larger square of paper (e.g., if your box base is from a 6-inch square, use a 6.5-inch or 7-inch square for the lid). The larger box will then fit snugly over the smaller one.
Displaying and Gifting Your Finished Model
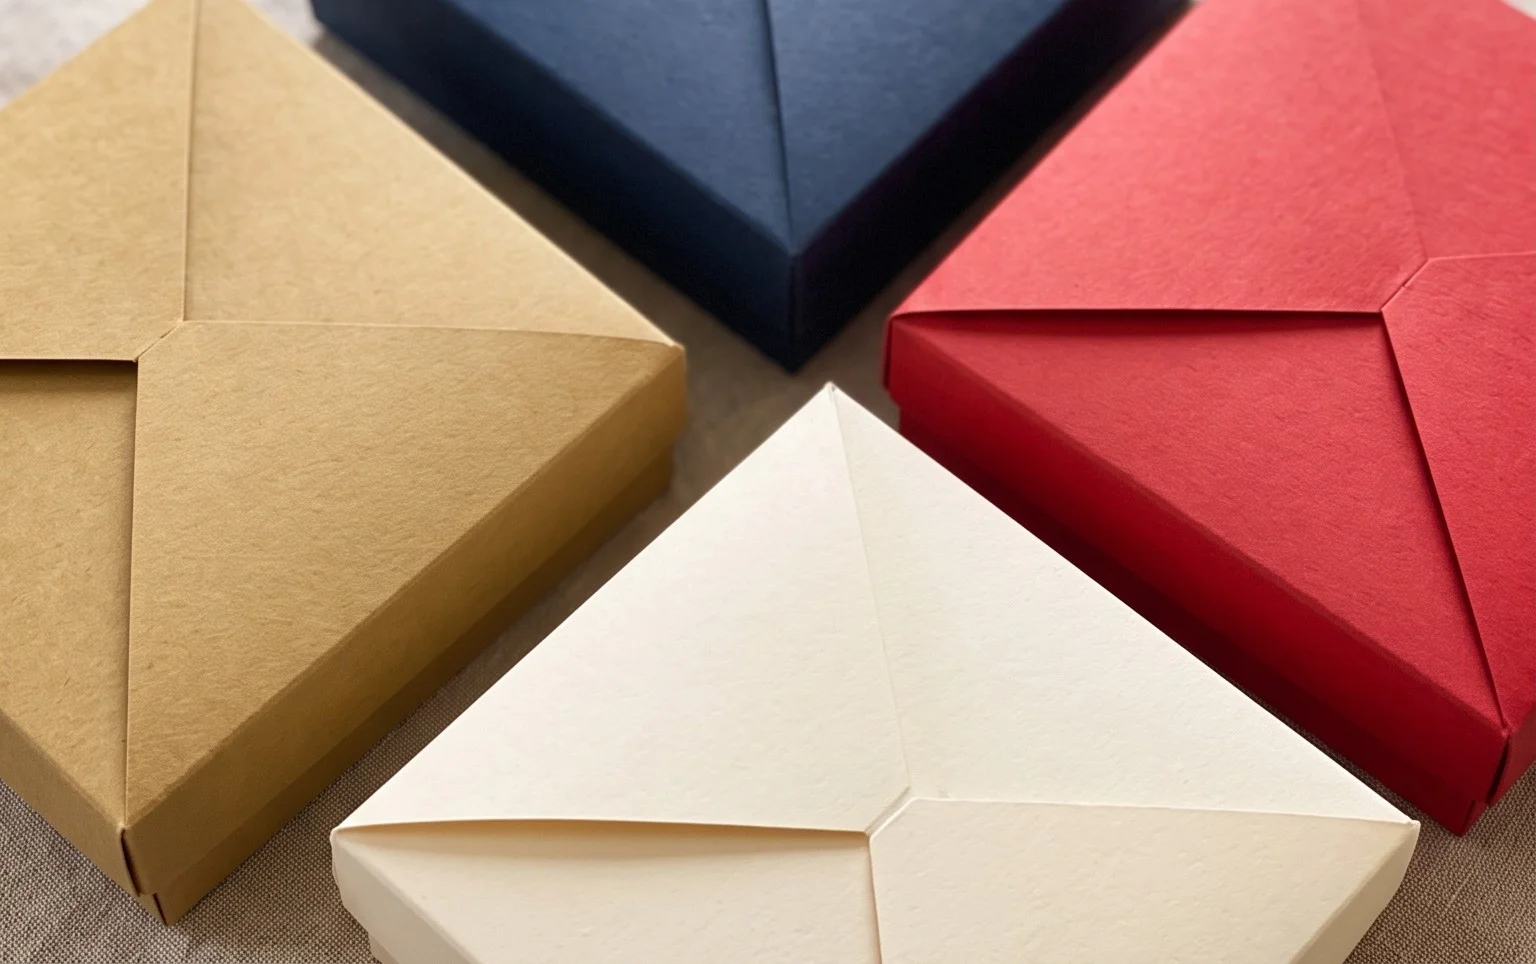
Your beautifully folded paper box is more than just a container; it’s a charming decorative piece and a thoughtful way to present a gift.
- Gifting: These boxes are perfect for small presents like jewelry, candies, gift cards, or even a handwritten note. They add a personal and handmade touch that store-bought boxes can’t replicate.
- Craft Storage: Keep your desk organized by storing paperclips, erasers, beads, or other small craft supplies in these neat little boxes.
- Desk Organizer: Use them to hold business cards, spare change, or even as a catch-all for small items.
- Party Favors: Fill them with treats and hand them out as favors at birthdays, weddings, or other celebrations.
- Home Decor: Cluster several boxes of different sizes and colors together on a shelf or table for a pop of color and visual interest.
I hope you’ve enjoyed learning how to fold this versatile paper box. It’s a wonderful skill to have in your crafting repertoire, and with a little practice, you’ll be folding boxes with ease. Happy folding!
Conclusion
Congratulations on folding your very own paper box! We hope you enjoyed this creative journey. Don’t worry if your first attempt isn’t perfect – every fold is a step in learning, and practice makes progress. We’d love to see what beautiful boxes you’ve created, so feel free to share your finished models!
Ready to explore further? Try adding decorative paper for a unique touch, or experiment with different sizes by adjusting your starting paper dimensions. There are so many exciting paper projects waiting for you to discover. Keep creating!
