Easy Feathered Tsuru Origami: Step-by-Step Paper Craft
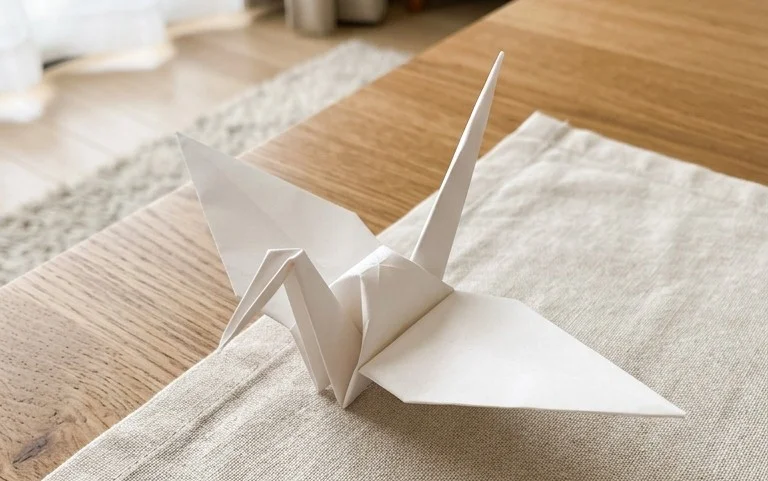
Feathered Tsuru CP origami is a beautiful and surprisingly accessible project, perfect for adding a touch of elegance to your day. Imagine a delicate crane, not quite like the traditional origami crane, but one with a distinctive, flowing mane of “feathers” cascading down its neck and back. This unique variation is fantastic for anyone looking for a step up from the absolute basics, though determined beginners and older kids will find it incredibly rewarding. It’s ideal for creating charming decorations for your home or thoughtful, handmade gifts that truly stand out. You can expect to spend about 20-30 minutes folding this lovely bird. In this tutorial, we’ll guide you step-by-step through the process, teaching you some wonderful new folds and techniques that will elevate your origami skills. Get ready to fold something truly special!
Crafting a Graceful Feathered Tsuru: An Origami Journey
Welcome, fellow paper enthusiasts! Today, we’re embarking on a delightful origami adventure to create the Feathered Tsuru, a beautiful variation of the classic origami crane. The Tsuru, or crane, is a symbol of good fortune, longevity, and peace in Japanese culture, and this feathered version adds an extra touch of elegance. Don’t worry if you’re new to origami; I’ll guide you through each step with clear, simple language. Let’s transform a humble sheet of paper into a work of art!
Choosing Your Canvas: The Perfect Paper
The paper you choose can significantly impact the final look and feel of your Feathered Tsuru. For this model, I highly recommend using traditional origami paper.
* **Type:** Standard origami paper is ideal. It’s thin enough to allow for crisp folds and accommodates multiple layers without becoming too bulky. Kami paper, which is a common type of origami paper, is a great choice.
* **Weight:** Aim for paper that’s around 70-80 gsm (grams per square meter). This provides a good balance of durability and foldability. Thicker paper can be challenging to fold precisely, especially in the later stages, while very thin paper might tear easily.
* **Size:** For your first Feathered Tsuru, I suggest starting with a square piece of paper that’s at least 6 inches (15 cm) by 6 inches (15 cm). This size is manageable for beginners, allowing you to see your folds clearly and make adjustments. As you gain confidence, you can experiment with smaller or larger sizes.
* **Single or Double-Sided:** For the Feathered Tsuru, I prefer using single-sided colored origami paper. This means one side is colored, and the other is white. This allows the beautiful color of your paper to show on the outside of the crane, while the white interior adds a subtle contrast. However, double-sided paper can also be used if you prefer a consistent color throughout your model. If you have double-sided paper and only want one color to show, just be mindful of which side is facing up at each step.
Building the Foundation: Essential Base Folds
Before we begin folding our Feathered Tsuru, we need to establish some fundamental origami bases. These are the building blocks of many origami models.
The Preliminary Base
This is a crucial starting point.
- Begin with your square piece of paper, colored side down if using single-sided paper.
- Fold the paper in half diagonally, bringing one corner to meet the opposite corner. Crease firmly. Unfold.
- Fold the paper in half diagonally again, this time bringing the other two opposite corners together. Crease firmly. Unfold. You should now have an “X” crease mark on your paper.
- Flip the paper over so the colored side is facing up.
- Fold the paper in half horizontally, bringing the bottom edge up to meet the top edge. Crease firmly. Unfold.
- Fold the paper in half vertically, bringing the left edge over to meet the right edge. Crease firmly. Unfold. You should now have a “+” crease mark on the paper.
- Now, gently push the left and right edges inwards towards the center. The creases you made will guide the paper. As you push, the top point will naturally come down to meet the bottom point. Flatten the model. This will result in a smaller square, with four flaps. This is your Preliminary Base. Ensure all edges are aligned as neatly as possible.
The Bird Base
This is the foundation for many bird-like origami models, including our Tsuru.
- Take your Preliminary Base and orient it so the open end (the end with the four flaps) is pointing towards you.
- Focus on the top layer of the flap that is closest to you.
- Fold the right edge of this top flap inwards to meet the center vertical crease. Crease firmly.
- Fold the left edge of this same top flap inwards to meet the center vertical crease. Crease firmly. You will have created a kite shape on the top flap.
- Now, fold the top triangular point of this kite shape down, aligning the tip with the point where the two folded edges meet at the bottom. Crease firmly.
- Unfold the last three folds you just made (the two side folds and the top triangle fold). You will see crease lines on the top flap.
- Now for a slightly trickier maneuver, but follow the creases! Lift the bottom point of the top flap upwards. As you lift, use the horizontal crease you made in step 5 as a guide. The sides of the flap will naturally fold inwards along the creases you made in steps 3 and 4. You are essentially “opening up” the flap and flattening it down into a diamond shape. This is called a Petal Fold. Ensure the point at the top is sharp and the sides are neat.
- Flip the entire model over.
- Repeat steps 2 through 7 on this new side. Fold the right edge to the center, then the left edge to the center. Fold the top triangle down. Unfold these three folds. Then, perform the Petal Fold by lifting the bottom point and collapsing the sides inwards.
You should now have a diamond shape with two “legs” at the bottom. This is your Bird Base.
The Feathered Tsuru Fold Sequence: A Step-by-Step Guide
Now that we have our Bird Base, let’s transform it into the elegant Feathered Tsuru!
- Start with your Bird Base, ensuring the open “legs” are pointing downwards and the closed point is at the top. The side with the two flaps that will become the wings should be facing upwards.
- Focus on the top layer of the diamond on the side facing you. Fold the right side edge inwards to meet the center vertical crease. Crease firmly.
- Fold the left side edge inwards to meet the center vertical crease. Crease firmly. You should now have a narrower diamond shape on the top layer.
- Flip the entire model over.
- Repeat steps 2 and 3 on this side. Fold the right edge to the center, then the left edge to the center.
- Now, we’ll create the neck and tail. Look at the two “legs” at the bottom. Take the right leg (the one on the right side of the model) and fold it upwards at an angle. The angle will determine how high the neck or tail will stand. A good starting point is to fold it so the leg is roughly parallel to the side edge of the diamond. Crease firmly.
- Take the left leg and fold it upwards at a similar angle, mirroring the fold you just made. Crease firmly.
- Now, we’ll refine the neck and tail. Take the right folded leg and fold it downwards at an angle to create the neck. The point should now be pointing downwards. The angle here will determine the curvature of the neck.
- Take the left folded leg and fold it downwards at a similar angle to create the tail. Crease firmly.
- Now for the “feathering.” On the neck piece, perform an inside reverse fold. This is where you open up the neck slightly and push the tip inwards between the layers. To do this, gently pull the neck outwards and slightly upwards. You’ll see a crease forming. Push the very tip of the neck downwards and inwards along that crease, so it’s hidden between the two layers of the neck. Flatten the neck. This creates a more defined head and neck.
- Repeat the inside reverse fold on the tail piece, pushing the tip inwards and downwards to create a smoother tail.
- Now, let’s make the wings. Grasp the entire model with both hands. Gently pull the two side flaps (the wings) downwards and outwards. As you pull them down, the body of the crane will expand slightly. Aim to create a graceful downward curve for the wings.
- To make the wings “feathered,” you’ll perform a similar inside reverse fold, but on a larger scale, on the underside of each wing. Gently pull the tip of each wing downwards and outwards. You’ll notice a crease forming. Open the wing slightly and push the tip of the wing upwards and inwards along that crease, so it’s hidden between the layers of the wing. This creates a subtle “feathered” edge. Repeat on the other wing.
- Finally, gently shape the body and wings to give your Feathered Tsuru a lifelike posture. You can gently curve the neck and tail, and adjust the angle of the wings.
Common Pitfalls and How to Conquer Them
Even experienced folders encounter challenges, so don’t be discouraged if you hit a snag! Here are a few common places beginners might go wrong and how to avoid them:
1. Sloppy Preliminary Base
The Preliminary Base is the bedrock of your entire model. If it’s not neat, the subsequent folds will be misaligned, leading to a wonky final product. Always take your time on this first step. Ensure corners meet corners and edges meet edges as precisely as possible. Crease firmly and intentionally, but don’t rip the paper. When collapsing it into the square, make sure the edges of the flaps are aligned neatly.
2. Incomplete or Crooked Petal Folds
The Petal Fold is crucial for forming the Bird Base. If you don’t fully unfold the initial kite folds, or if the paper doesn’t collapse neatly along the creases, your Bird Base will have uneven flaps. Before you attempt the Petal Fold, make sure those initial creases are sharp. When you lift the bottom point, visualize the sides folding inwards along those existing creases. Don’t force it; let the creases guide the paper. If it’s not collapsing smoothly, pause, check your creases, and try again.
3. Overly Aggressive Inside Reverse Folds
The inside reverse folds are what give the Feathered Tsuru its characteristic head, neck, and feathered wings. If you try to push the paper too hard or in the wrong direction, you can create unwanted crinkles or even tear the paper. For the head and tail, be gentle. Open the neck/tail just enough to create a small gap, then carefully push the tip inwards. For the wings, it’s a similar idea: pull them down to create the crease, then gently tuck the tip in. It’s more about guiding the paper than forcing it.
Personalizing Your Creation: Variations on a Theme
The beauty of origami lies in its adaptability. Once you’ve mastered the basic Feathered Tsuru, feel free to experiment!
* **Size:** As I mentioned, start with a larger square for practice. Once you’re comfortable, try smaller squares. Miniature Feathered Tsurus are adorable and can be used in garlands or as tiny charms. Larger ones make for impressive display pieces.
* **Paper Pattern and Color:** Don’t be afraid to step away from plain colors! Origami paper comes in an incredible array of patterns, from delicate floral designs to bold geometric prints. Using patterned paper can give your Feathered Tsuru a unique personality. You can also use papers with metallic finishes or subtle textures for added elegance. Consider using two different colored sheets of paper sandwiched together (with a bit of glue stick if they don’t stick well) for a two-toned effect on your crane’s wings or body.
* **Paper Type:** While origami paper is ideal, you can also experiment with other materials. Washi paper, with its beautiful texture, can create a very sophisticated Tsuru. Even recycled paper can be used for a more rustic charm, though it might be trickier to fold.
Bringing Your Feathered Tsuru to Life: Display and Gifting Ideas
Your completed Feathered Tsuru is more than just a folded piece of paper; it’s a symbol of good wishes and a testament to your creativity.
* **Desktop Display:** A single, perfectly folded Feathered Tsuru can be a beautiful addition to your desk, bringing a touch of calm and artistry to your workspace. You can lean it against a small object or even craft a simple stand from a folded piece of paper.
* **Mobile or Garland:** String several Feathered Tsurus together to create a charming mobile or a decorative garland. Hang them in a window, across a mantelpiece, or even along a bookshelf.
* **Gift Topper:** Imagine topping a gift with a delicate Feathered Tsuru instead of a bow. It’s a thoughtful and unique touch that shows you’ve put extra care into the presentation.
* **Symbolic Gifts:** Traditionally, 1000 origami cranes are folded to grant a wish. While one Feathered Tsuru carries a wish too, you can gift a single crane as a symbol of good luck, health, or peace to someone special. It makes a wonderful present for birthdays, holidays, or just as a “thinking of you” gesture.
* **Part of a Larger Scene:** Combine your Feathered Tsuru with other origami creations to build a miniature landscape or a still life.
I hope you’ve enjoyed folding your Feathered Tsuru with me today. Remember, practice makes perfect, and the most important part is to enjoy the process of creation. Happy folding!
Conclusion
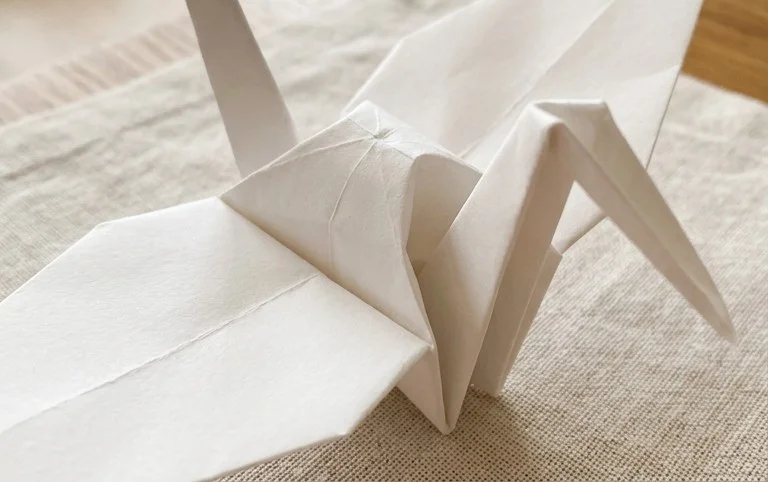
Congratulations on completing your very own Feathered Tsuru CP! We hope you enjoyed the process of bringing this beautiful origami crane to life. Don’t worry if your first attempt wasn’t perfect; every fold is a step towards mastery, and practice truly makes perfect in the world of origami. We’d love to see your finished Feathered Tsuru CP, so feel free to share your creation!
What’s Next?
Ready for more paper adventures? Try adding patterned paper for a vibrant look, or experiment with different sizes for a flock of unique cranes. We have many more exciting paper projects waiting for you to discover. Happy folding!
