Easy Origami Mini Lid Banjo: Step-by-Step Paper Craft
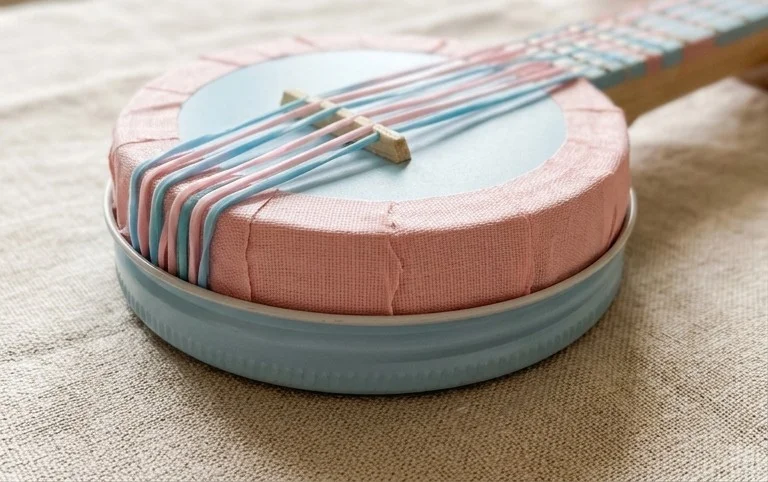
How to make a mini lid banjo! Ready for a surprisingly musical little project? Today, we’re diving into the delightful world of origami to create a charming mini banjo with a lid. Imagine a tiny, perfectly formed banjo, complete with its round resonator lid and a delicate neck, all folded from a single sheet of paper. It’s the perfect adorable craft for complete beginners, curious kids, or anyone looking for a unique handmade gift or a sweet desk decoration. In about 10-15 minutes, you’ll be amazed at what you can fold! We’ll walk through each step together, focusing on clean creases and sharp points to bring your paper banjo to life. Let’s get folding!
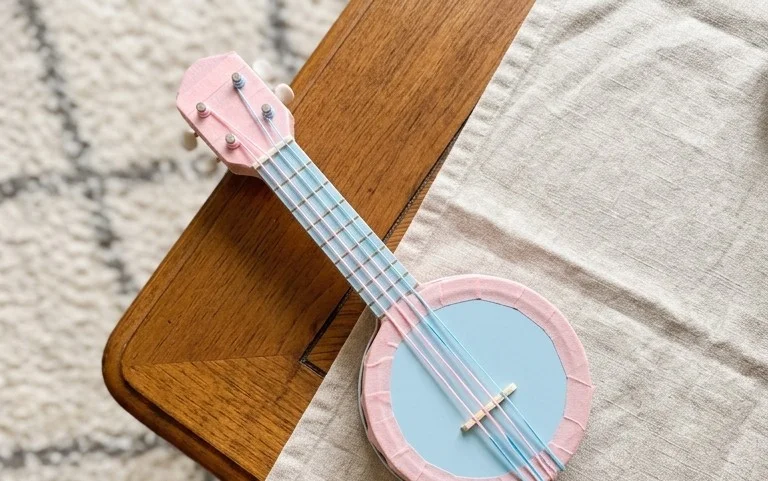
How to Make a Mini Lid Banjo with Origami
Hello, origami enthusiasts! Today, we’re going to embark on a delightful origami journey to create a miniature banjo with a lid. This is a charming little model that’s perfect for decoration, as a tiny gift, or even as a playful bookmark. Don’t worry if you’re new to origami; I’ll guide you through each step with clear, plain language. We’ll focus on making crisp, clean folds because, as you’ll discover, precision is key in origami.
Choosing Your Paper: The Foundation of Your Banjo
Before we begin folding, let’s talk about paper. The right paper can make all the difference in how your mini banjo looks and feels.
Type of Paper
For this particular model, a standard origami paper is excellent. It’s usually thin enough to allow for multiple folds without becoming too bulky, yet strong enough to hold its shape. If you don’t have dedicated origami paper, printer paper can work in a pinch, but it’s a bit thicker, so you might find it harder to make very sharp creases.
Weight
Origami paper typically ranges from 60gsm to 120gsm. For our mini banjo, a weight in the middle, around 70-90gsm, is ideal. This provides a good balance of durability and foldability. If you’re using thicker paper like cardstock, you’ll likely struggle with the later folds.
Size
I recommend starting with a square sheet of paper that is at least 6 inches by 6 inches (15 cm by 15 cm). This size is manageable for beginners and will result in a nicely sized mini banjo. If you’re feeling ambitious, you can try smaller sizes, but be warned, they become much trickier!
Single or Double-Sided Paper
For this model, using double-sided paper can add a lovely contrast between the banjo’s body and its lid. For example, you could use yellow paper on one side and black on the other. This way, when we make folds that reveal different sides of the paper, you’ll get a nice visual effect. However, single-sided paper works perfectly well too; you’ll just have a uniform color for your banjo.
The Base Folds: Building the Structure
Before we get into the specific banjo folds, let’s practice a couple of essential base folds that will form the foundation of our model. Making these clean will set you up for success.
The Preliminary Base
The preliminary base is a fundamental origami fold. Start with your square of paper with the colored side down (if using double-sided paper).
1. Fold the paper in half diagonally, bringing the bottom-left corner up to meet the top-right corner. Crease firmly. Unfold.
2. Now, fold the paper in half diagonally the other way, bringing the bottom-right corner up to meet the top-left corner. Crease firmly. Unfold. You should now have an ‘X’ crease pattern.
3. Flip the paper over so the colored side is facing up.
4. Fold the paper in half horizontally, bringing the bottom edge up to meet the top edge. Crease firmly. Unfold.
5. Fold the paper in half vertically, bringing the left edge over to meet the right edge. Crease firmly. Unfold. You should now have a ‘+’ crease pattern on this side.
6. Now, bring the left and right sides inwards along the vertical creases. As you do this, the top and bottom edges will naturally come together. Flatten the paper down so it forms a smaller square. This is your preliminary base. Make sure the open edges are pointing towards you.
The Kite Base
The kite base is another crucial fold for many origami models.
1. Take your preliminary base and place it with the closed point facing away from you and the open edges pointing towards you.
2. Take the bottom-left edge of the top layer of paper and fold it so it aligns with the center vertical crease. Crease firmly.
3. Repeat with the bottom-right edge of the top layer, folding it to align with the center vertical crease. Crease firmly. You should now have a kite shape on the top layer.
4. Flip the entire model over.
5. Repeat steps 2 and 3 on this side, folding the bottom-left and bottom-right edges to the center vertical crease. You should now have a kite shape on both sides.
The Fold Sequence: Bringing Your Banjo to Life
Now that we’ve practiced our base folds, let’s assemble our mini banjo! We’ll be working with the kite base.
1. **Prepare the Kite Base:** Start with your kite base. Ensure the open edges are pointing towards you, and the closed point is facing away. If you’re using double-sided paper and want the lid to be a different color, make sure the color you want for the lid is currently facing *down* at this point, with the color you want for the banjo body facing *up*.
2. **Fold the ‘Neck’ Tab:** Take the top point of the kite (the closed point) and fold it down towards the open edges. The tip of this point should meet the bottom edge of the kite shape (where the two folded edges meet the center). Crease firmly. This fold creates the ‘neck’ area of our banjo.
3. **Fold Up the Bottom Flap:** Now, look at the bottom open edges. You’ll see two flaps pointing towards you. Take the very bottom tip of the top flap (the one closest to you) and fold it upwards, so its tip meets the point where the fold from step 2 ends. Crease firmly. This flap will form part of the banjo’s body.
4. **Secure the Body:** Take the right side of the flap you just folded up and fold it towards the center vertical line. The edge you are folding should align with the center crease. Crease firmly.
5. **Repeat on the Left:** Do the same with the left side of that same flap. Fold the left edge of the flap towards the center vertical line, aligning it with the center crease. Crease firmly. You should now have two small triangular flaps meeting in the center.
6. **Tuck and Fold:** Now, look at the flap you just folded and creased. You’re going to fold the entire thing upwards. The bottom edge of this flap (where the two triangular folds meet) should be brought up to align with the horizontal fold line you made in step 2 (the one that defined the ‘neck’). Crease this entire section very firmly. This is a crucial fold for shaping the banjo’s body.
7. **Forming the Lid – Part 1:** Flip the entire model over. You should see a smooth, kite-shaped surface with the folded-down ‘neck’ tab visible at the top.
8. **Forming the Lid – Part 2:** Take the top point (the closed point of the kite) and fold it down towards the bottom edge. Don’t fold it all the way to the bottom edge. Instead, align the tip of this point with the horizontal crease line you made in step 6 (the one that created the main body fold). Crease firmly. This is the ‘lid’ of your banjo.
9. **Shaping the Body:** Turn the model back over so you are looking at the side with the flaps. You should see the body of the banjo formed by the folded flaps.
10. **Final Touches (Optional String Holes):** For a more detailed look, you can create the impression of banjo strings. With a fine-tipped pen or marker, you can draw two or three thin, parallel lines across the ‘lid’ of the banjo.
Congratulations! You’ve just made a mini lid banjo!
Common Pitfalls and How to Avoid Them
Even with clear instructions, it’s easy to make a few slips when you’re starting out. Here are some common places beginners tend to go wrong and how to steer clear of them.
1. Sloppy Creases
This is probably the most common issue. If your creases aren’t sharp and precise, the model can end up looking a bit wobbly and won’t hold its shape well.
* **How to Avoid:** Always use your fingernail or a bone folder to run along each fold. Don’t just lightly press down. Press firmly and then reinforce the crease by running your fingernail along it again. Think of it as committing to each fold.
2. Misaligned Corners and Edges
Origami relies on accurate alignment. If a corner doesn’t quite meet its intended edge, subsequent folds will be off.
* **How to Avoid:** Take your time with each fold. Before you crease, double-check that the corner or edge you’re moving is perfectly aligned with its destination. If you’re folding a corner to an edge, lay the paper flat and ensure the corner point touches the edge precisely where you intend it to. For folds along the center, make sure the edges you’re bringing together are perfectly parallel.
3. Forgetting to Flip or Working on the Wrong Side
Some steps require you to flip the model over, or you might be working on the wrong side of the paper. This can lead to the model not forming correctly.
* **How to Avoid:** Pay close attention to instructions that say “flip the model over” or specify which side to work on. If you’re using double-sided paper, mentally keep track of which color should be showing. It can be helpful to pause and look at your model from different angles to ensure you’re on the correct side.
Varying Your Mini Banjo
Once you’ve mastered the basic fold, the fun really begins with customization!
Size Variations
* **Smaller:** Use smaller squares of paper for a truly miniature banjo. Be aware that this will require much more precision and dexterity.
* **Larger:** Use larger squares of paper. This can be great for making a more prominent decorative piece.
Paper Pattern and Colour
This is where you can let your creativity shine!
* **Patterned Paper:** Try using patterned origami paper. Floral patterns, geometric designs, or even paper with musical notes can create beautiful effects.
* **Solid Colours:** Experiment with different solid colour combinations. A bright red banjo or a deep blue one can be striking. If using double-sided paper, consider contrasting colours for the banjo body and the lid for a more dynamic look. For instance, a vibrant yellow body with a black lid, or a grassy green body with a sky-blue lid.
Displaying and Gifting Your Creation
Your finished mini banjo is more than just a folded piece of paper; it’s a tiny work of art!
Display Ideas
* **Desk Buddy:** Place it on your desk as a cheerful companion.
* **Bookshelf Decor:** It adds a whimsical touch to any bookshelf.
* **Miniature Scene:** Incorporate it into a larger diorama or dollhouse scene.
* **Bookmark:** The slightly thicker body of the banjo makes it a surprisingly effective and charming bookmark.
Gifting Ideas
* **Handwritten Card:** Attach it to a handmade card for a personal touch.
* **Gift Topper:** Use it as a unique and memorable topper for a present.
* **Party Favors:** Make a batch for guests at a musical-themed party.
* **Small Token of Appreciation:** It’s a lovely way to show someone you’re thinking of them.
I hope you’ve enjoyed making your mini lid banjo! With a little practice and attention to detail, you’ll be creating these charming models with ease. Happy folding!
Conclusion
Congratulations on completing your mini lid banjo! We hope you enjoyed this fun and simple origami project. Don’t worry if your first banjo isn’t perfect; practice makes progress! We encourage you to try it again, perhaps focusing on crisper folds to achieve an even neater result. Once you’ve got your mini lid banjo ready, why not share your creation with friends or family? For your next paper adventure, try a simple origami box or a flapping bird. There are so many wonderful paper projects to discover, so keep folding and have fun exploring the world of origami!