Easy Origami Paper Roll Cat Craft: Step-by-Step
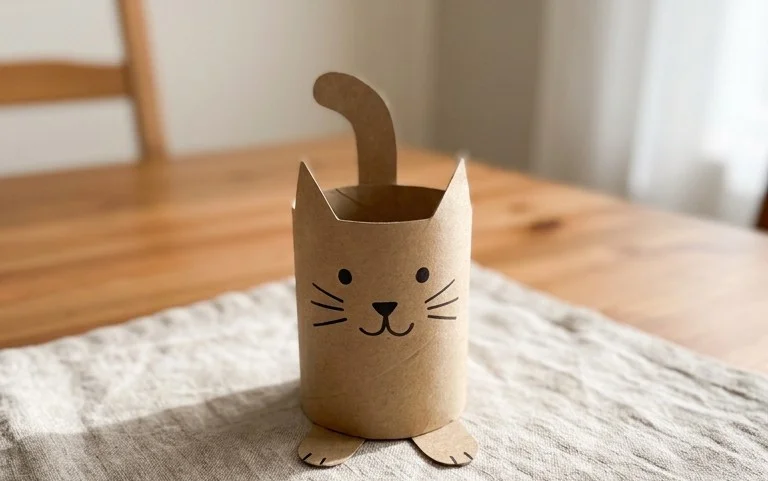
Paper roll cat crafts are so much fun to make and create the most adorable little felines! Imagine tiny, charming cats, each with their own unique personality brought to life through simple folds and rolls of paper. These little kitties make perfect decorations for shelves, desks, or even as sweet little gifts. This project is fantastic for complete beginners, and especially wonderful for kids to enjoy, taking around 30 minutes from start to finish. Throughout this tutorial, you’ll learn how to transform basic paper rolls into playful cats with cute ears, whiskers, and a tail. Let’s get ready to unleash our inner crafters and bring these delightful paper pals to life together!
Origami Paper Roll Cat Craft Tutorial
Hello, wonderful crafters! Today, we’re going to embark on a delightful journey into the world of origami to create an adorable Paper Roll Cat. This project is perfect for beginners, offering a satisfying blend of simple folding and charming results. We’ll walk through each step together, ensuring you can achieve a purr-fectly cute cat every time.
Choosing Your Paper: The Foundation of a Fabulous Feline
The type of paper you choose will significantly impact the look and feel of your origami cat. For this project, I recommend sticking to standard origami paper.
Paper Type and Weight
Origami paper is ideal because it’s designed for folding. It’s usually a bit thinner than regular printer paper, making it easier to achieve crisp folds without adding too much bulk. The weight is typically around 60-70 gsm (grams per square meter), which provides a good balance of durability and flexibility. If you don’t have dedicated origami paper, you can try using thinner craft paper or even carefully selected printer paper. However, be aware that thicker paper can make the final model a bit clunky and harder to fold neatly.
Paper Size
For a beginner-friendly cat, a square piece of paper around 6 inches (15 cm) by 6 inches (15 cm) is a great starting point. This size is manageable for learning the folds and results in a cute, palm-sized cat. If you want to make a larger cat, you can scale up the paper size. Conversely, for tiny, intricate kittens, you can use smaller squares, but this will require more precision.
Single or Double-Sided Paper
You can use both single-sided and double-sided origami paper. Single-sided paper, where one side is coloured and the other is white, will result in a cat with coloured ears and a white belly and back. This can add a nice visual contrast. Double-sided paper, where both sides are coloured, will give you a uniformly coloured cat, which is also very appealing. Consider what aesthetic you’re going for when making your choice.
The Base Folds: Building Blocks for Your Cat
Before we dive into the cat itself, let’s familiarize ourselves with some fundamental origami folds. Mastering these will make the entire process smoother.
The Valley Fold
A valley fold is the most basic fold. Imagine folding the paper towards you, creating a “valley” in the crease. To make a clean valley fold, align your edges or corners precisely, then run your finger or a bone folder firmly along the crease from the center outwards.
The Mountain Fold
A mountain fold is the opposite of a valley fold. You fold the paper away from you, creating a ridge or “mountain” shape. To make a clean mountain fold, you’ll often perform a valley fold first, then unfold and reverse the crease so it pops upwards. Again, precision in alignment and a firm crease are key.
Diagonal Folds
These are simply valley folds made along the diagonals of your square paper. We’ll use these extensively.
The Preliminary Base (Waterbomb Base Variant)
While we won’t be making a traditional preliminary base, we will be using a similar concept of collapsing paper. Think of it as creating a structure by bringing edges together. The key is to ensure the paper naturally wants to fold in certain directions, which we achieve through our initial diagonal folds.
Your Origami Paper Roll Cat: A Step-by-Step Adventure
Let’s get folding! Remember to be patient with yourself, especially if this is your first time.
1. **Start with your square paper, coloured side up (if using single-sided paper).** Place it flat in front of you.
2. **Fold the paper in half diagonally.** Bring the bottom-left corner up to meet the top-right corner. Crease firmly, then unfold.
3. **Fold the paper in half diagonally again.** Bring the bottom-right corner up to meet the top-left corner. Crease firmly, then unfold. You should now have an “X” crease pattern on your paper.
4. **Flip the paper over.** So the white side (if using single-sided paper) is now facing up.
5. **Fold the paper in half horizontally.** Bring the bottom edge up to meet the top edge. Crease firmly, then unfold.
6. **Fold the paper in half vertically.** Bring the left edge over to meet the right edge. Crease firmly, then unfold. You should now have a “+” crease pattern on this side.
7. **Now, we’re going to collapse the paper.** Gently push the left and right edges inwards, towards the center. The top and bottom edges should naturally come together. Use the creases you’ve already made to guide this. The paper will flatten into a smaller square with four flaps. This is a variation of the waterbomb base. Make sure the opening of this square is at the bottom.
8. **Take the top-right flap of the top layer and fold its bottom edge up to meet the center vertical crease.** Crease firmly.
9. **Repeat step 8 with the top-left flap of the top layer.** You’ll now have two “kite” shapes pointing upwards.
10. **Fold the small triangular tip that’s sticking out at the very top of the paper down.** Fold it down over the two kite flaps you just created. Crease firmly.
11. **Flip the entire model over.**
12. **Repeat steps 8 and 9 on this side.** Fold the bottom edge of the top-right flap up to the center crease, and then the bottom edge of the top-left flap up to the center crease.
13. **Fold the small triangular tip at the top down over these flaps.** Crease firmly. You should now have a shape that looks a bit like a flattened diamond with two points sticking out at the top.
14. **This is where the “roll” part comes in!** Take the right-hand point (the one on the right side of the diamond shape) and bring it around to the back of the model, tucking it slightly underneath the other side. This will start to form the cat’s body. You’re essentially wrapping this flap around to create a cylinder. You’ll need to gently persuade it.
15. **Repeat step 14 with the left-hand point.** Bring it around to the back and tuck it slightly. This will create a more pronounced cylindrical shape. The two points will overlap slightly at the back.
16. **Now, let’s form the head.** Look at the top opening of your cylinder. You’ll see two flaps. Take the front flap and fold it upwards and slightly back. This will be the cat’s face. You might need to gently crease this to help it stand up.
17. **Take the back flap and fold it upwards and slightly back as well.** This forms the back of the head and helps support the face.
18. **To make the ears, take the two little points that are now sticking up from the top of the head.** Gently fold each of these points down a little bit. Don’t fold them flat against the head; just a small fold to create the illusion of ears.
19. **You can now gently open up the bottom of the “roll” to help your cat stand.** It should naturally have a slight curve that allows it to rest upright.
Common Pitfalls and How to Avoid Them
Don’t worry if your first attempt isn’t perfect! Origami is a journey of practice. Here are a couple of places beginners often stumble and how to sidestep those issues.
Misaligned Folds
* **The Problem:** If your corners and edges aren’t precisely aligned before you crease, your final model can look lopsided or have gaps. This is especially noticeable in steps like folding the kite shapes or when collapsing the paper.
* **How to Avoid It:** Take your time! Before making any crease, ensure that the points or edges you are bringing together meet exactly. Don’t rush through this. If using a bone folder or even the edge of a ruler, use it to gently guide the paper into alignment before pressing down to crease.
Overly Stiff Creases or Rips
* **The Problem:** Sometimes, beginners press down too hard on certain folds, especially in the initial steps, which can make the paper stiff and difficult to manipulate later. Conversely, trying to force a fold that isn’t naturally occurring can lead to tears.
* **How to Avoid It:** Aim for firm but controlled creases. You want the fold to hold its shape, but you don’t want to crush the paper. Use the side of your fingernail or a bone folder, and run it along the fold line smoothly. For the collapsing step (step 7), let the existing creases guide the paper naturally. If you feel a lot of resistance, gently re-examine your creases and see if they’re guiding the paper correctly. For the “roll” part (steps 14 and 15), be gentle; the paper is meant to curve.
Unstable Base
* **The Problem:** If the initial collapse (step 7) isn’t quite right, or if the “roll” isn’t secured well, your cat might lean or fall over.
* **How to Avoid It:** Ensure that the four flaps created in step 7 are layered neatly on top of each other. When you perform the rolling action (steps 14 and 15), make sure the flaps are tucked enough to create a somewhat stable cylinder. You might need to adjust the overlap slightly. Once the head is formed (steps 16-18), gently open the base to create a wider stance, which will improve stability.
Variations to Spark Your Creativity
Once you’ve mastered the basic cat, don’t be afraid to experiment! Origami is all about personal expression.
Size Matters
* **Larger Cats:** Use larger squares of paper. A 10-inch (25 cm) square will give you a much more substantial cat.
* **Smaller Kittens:** Try using 3-inch (7.5 cm) squares for tiny, adorable kittens that can perch on your fingertip. This will require a bit more dexterity.
Paper Patterns and Colours
* **Patterned Paper:** Origami paper comes in a dazzling array of patterns – from floral designs to geometric prints. Using patterned paper can give your cat a unique personality. Think about how the pattern will look on the ears or body.
* **Solid Colours:** Experiment with different solid colours. A sleek black cat, a cheerful orange tabby, or a calming blue kitty – the possibilities are endless! You can even try colour-blocking by using different coloured papers for different parts if you’re feeling ambitious and want to create a multi-piece model (though this goes beyond the basic tutorial).
* **Textured Paper:** Some specialty papers have subtle textures that can add an interesting tactile element to your finished cat.
Displaying and Gifting Your Feline Friends
Your completed paper roll cats are not just pretty; they’re also wonderful little creations to share!
Display Ideas
* **Desk Companions:** Place them on your desk or bookshelf as charming decorative accents. They’re a lovely way to add a touch of whimsy to your workspace.
* **Shelf Decor:** Group a few cats of different sizes and colours together on a shelf for a delightful display.
* **Nature Scene:** Imagine a few little cats perched on a potted plant, looking like they’re exploring a tiny jungle.
* **Mobile:** With a bit of thread, you can create a simple origami cat mobile for a nursery or creative space.
Gifting Ideas
* **Sweet Surprise:** Tuck one into a greeting card or a birthday present as a unique and handmade gift.
* **Party Favors:** Make a batch for a child’s birthday party or a crafting event as delightful party favors.
* **”Thinking of You” Gift:** A small, handcrafted item like this can convey a lot of warmth and care without being extravagant.
* **Crafting Kits:** For friends who enjoy crafting, you could assemble a small kit with pre-cut squares of origami paper and instructions.
I hope you’ve enjoyed creating your Paper Roll Cat! Remember, the most important ingredient is your enthusiasm and a willingness to try. Happy folding!
Conclusion
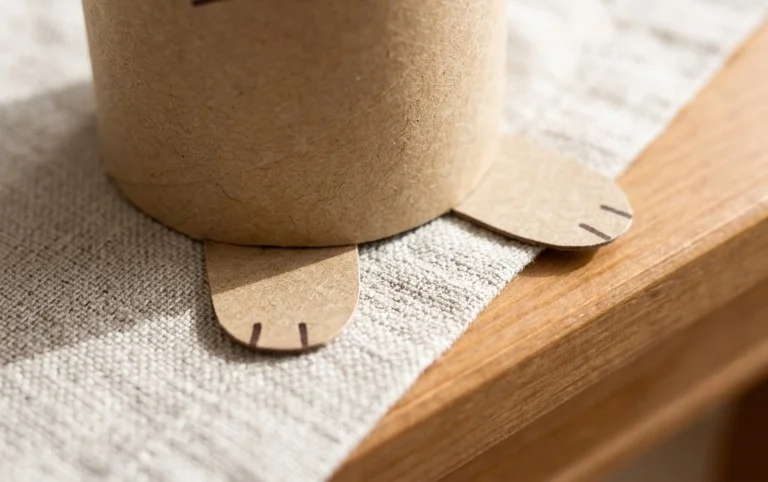
Congratulations on completing your adorable paper roll cat craft! We hope you had a delightful time folding and bringing this feline friend to life. Don’t worry if your first attempt isn’t purr-fect; remember, every creation is a learning experience, and practice makes progress! We’d love to see your finished paper roll cat, so feel free to share your masterpiece with friends and family. For your next adventure, try creating a playful dog by adjusting the ears and adding a wagging tail, or perhaps a curious mouse with a long, thin tail. There are so many wonderful paper projects waiting for you to explore on hello, Wonderful! Keep those hands busy and let your creativity shine!